How to improve drainage in garden

Jess lee |
Poor drainage can wreak havoc on your garden and lawn, particularly after a heavy rain shower. Standing water and soggy conditions prevent oxygen from reaching roots and, in this environment, fungi such as root rot can easily take hold, damaging or killing the plants and grass in your garden.
While global warming has seen winters become milder, an increase in average rainfall has actually seen the UK’s unique weather conditions become gradually wetter in recent years. As a result, many more gardens in the UK have started to suffer when it comes to drainage.
Boggy and waterlogged conditions are far from optimal, especially when you are trying to maintain a lush, green lawn and healthy flowerbeds. In this post we explore ways of improving drainage in your garden, focusing specifically on how to fit a channel drainage system which can help to prevent your outdoor area from becoming damaged through over-irrigation.
How to fit channel drainage systems
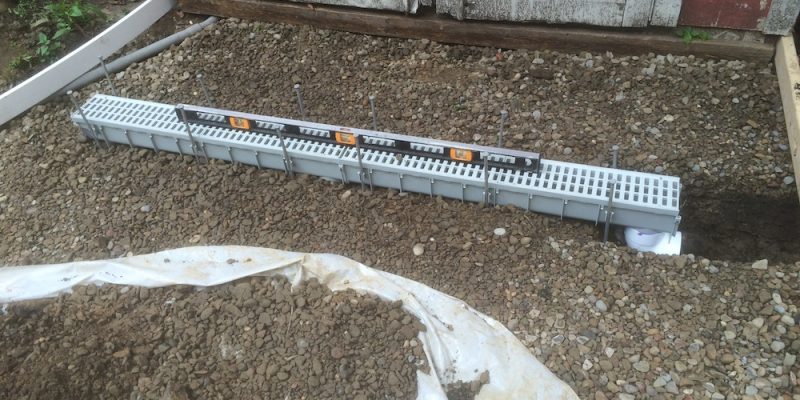
Channel drainage refers to systems that drain liquid along their entire length, rather than at just one particular point or hole as seen in more traditional forms of drainage. This usually involves a u-shaped channel which sits just under the ground, covered with a grate which is placed at surface level. Excess surface water simply filters down through the grate and is carried away by the channel.
This form of drainage is at its most effective when installed in sloped gardens. Thanks to gravity, this slope will help in directing excess rainwater into the channel drain and away from the waterlogged areas of your garden. To install your own channel drainage system, simply follow this process:
⦁ Dig a trench which is deep enough to house at least 50mm of compacted sand at the base and is wide enough for 100mm of concrete to fill each side of the channel. Bear in mind that if your garden doesn’t have a natural slope, you will have to build in a fall of at least 5mm for every 1m of drain you are laying. This gradient can be achieved by using a taut string stretched along the side of the trench which can serve as a guide to indicate the height of where the grating should finish.
⦁ Install the channel from the lowest point of the trench to ensure that if you need to cut out any lengths, they remain at the furthest point away from the outlet and at the top of the slope. As you lay your channel, connect the lengths - they should simply slot together, creating joints that can be sealed using silicone sealant to prevent leakages. When you reach the end of your trench, you may need to cut the final length to size. Once done, simply install an end cap and go about connecting the lowest end of the channel to a drainage pipe.
⦁ When it comes to how to connect the drainage channel to the drain, this is relatively straightforward. Ensuring the main drain you are connecting to is at a lower level than your newly installed channel drain, use one of the three bottom outlets that can be found on each length of channel drain. Simply cut out the marked base section inside the circular outlet and inset a piece of 110mm drainage pipe. This can then lead to a main drain of your choice - preferably one located in close proximity. Finally, the pipe joint can then be sealed using silicone sealant before concrete is poured on top.
⦁ Place the grating onto the top of the channel, ensuring it is fitted securely. Next, pour concrete into the trench either side of the channel, stopping 1mm above the surface of the grating. Once this has been done, allow the concrete at least 72 hours to set before placing any weight on top of the grates.


